Shopify Integration
Adding Uptick to Your Theme
1. Install the Uptick Shopify App
To get started, install the Uptick app from the Shopify App Store .
2. Enable Uptick-Managed Offers
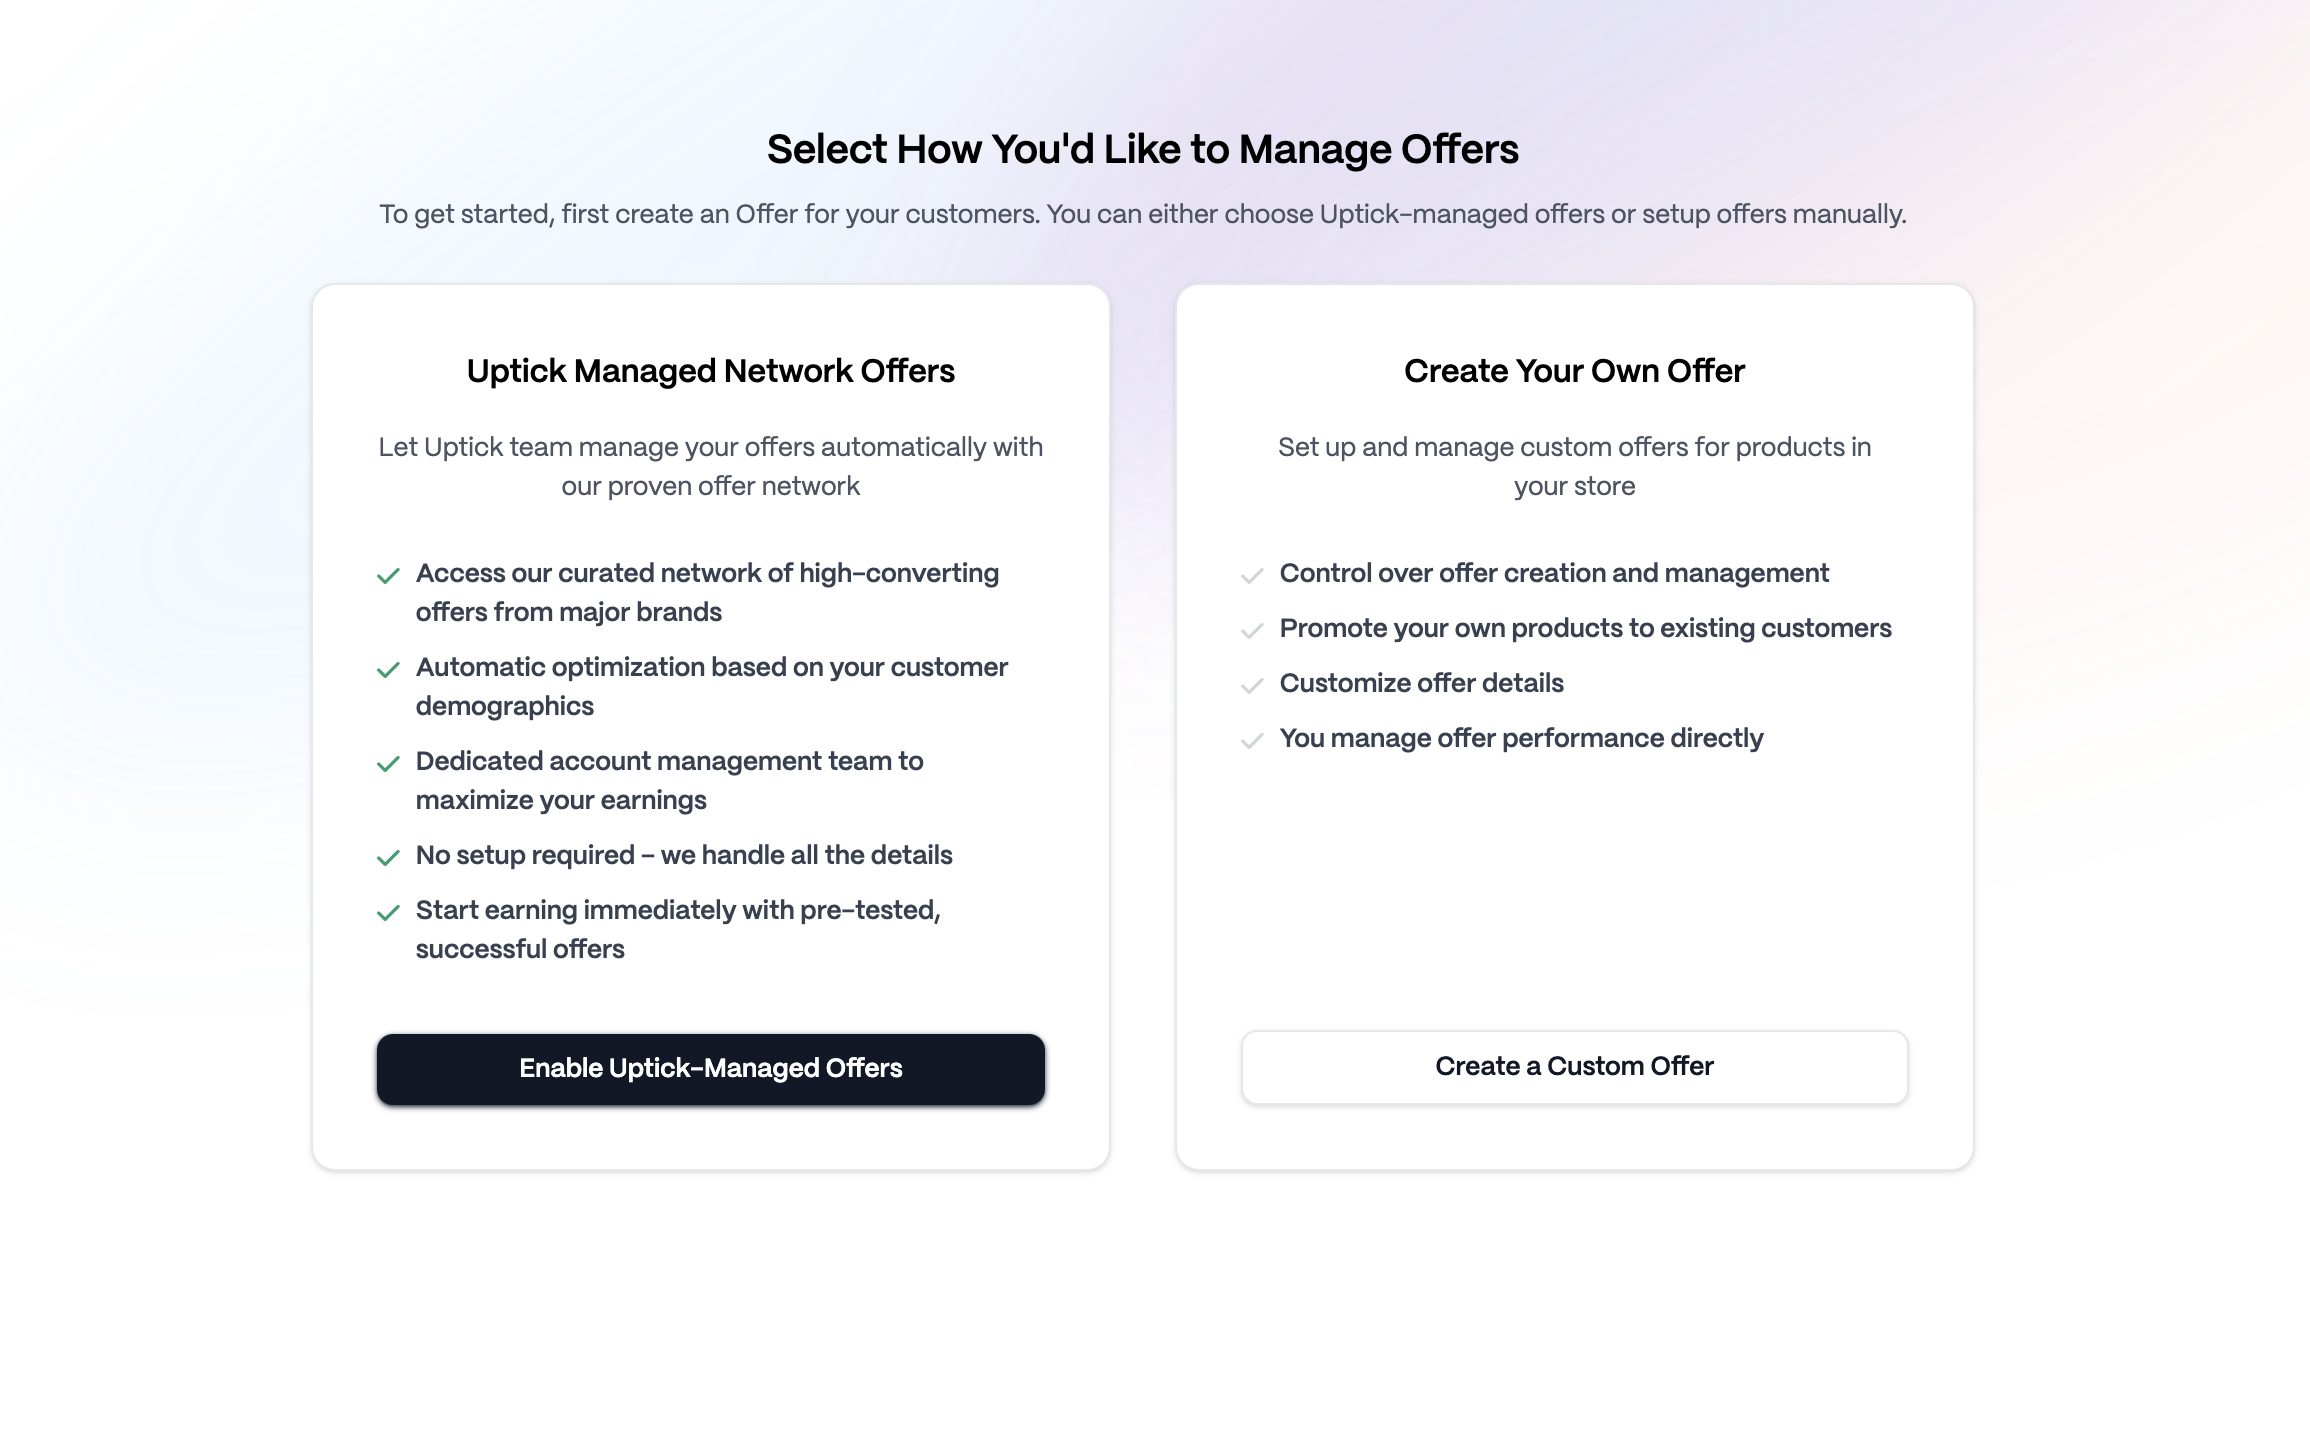
Once installed, you’ll be prompted with an option to choose how you’d like to manage offers.
Click the “Enable Uptick-Managed Offers” button to allow Uptick to automatically manage your offers via our curated offer network.
3. Access the Online Store
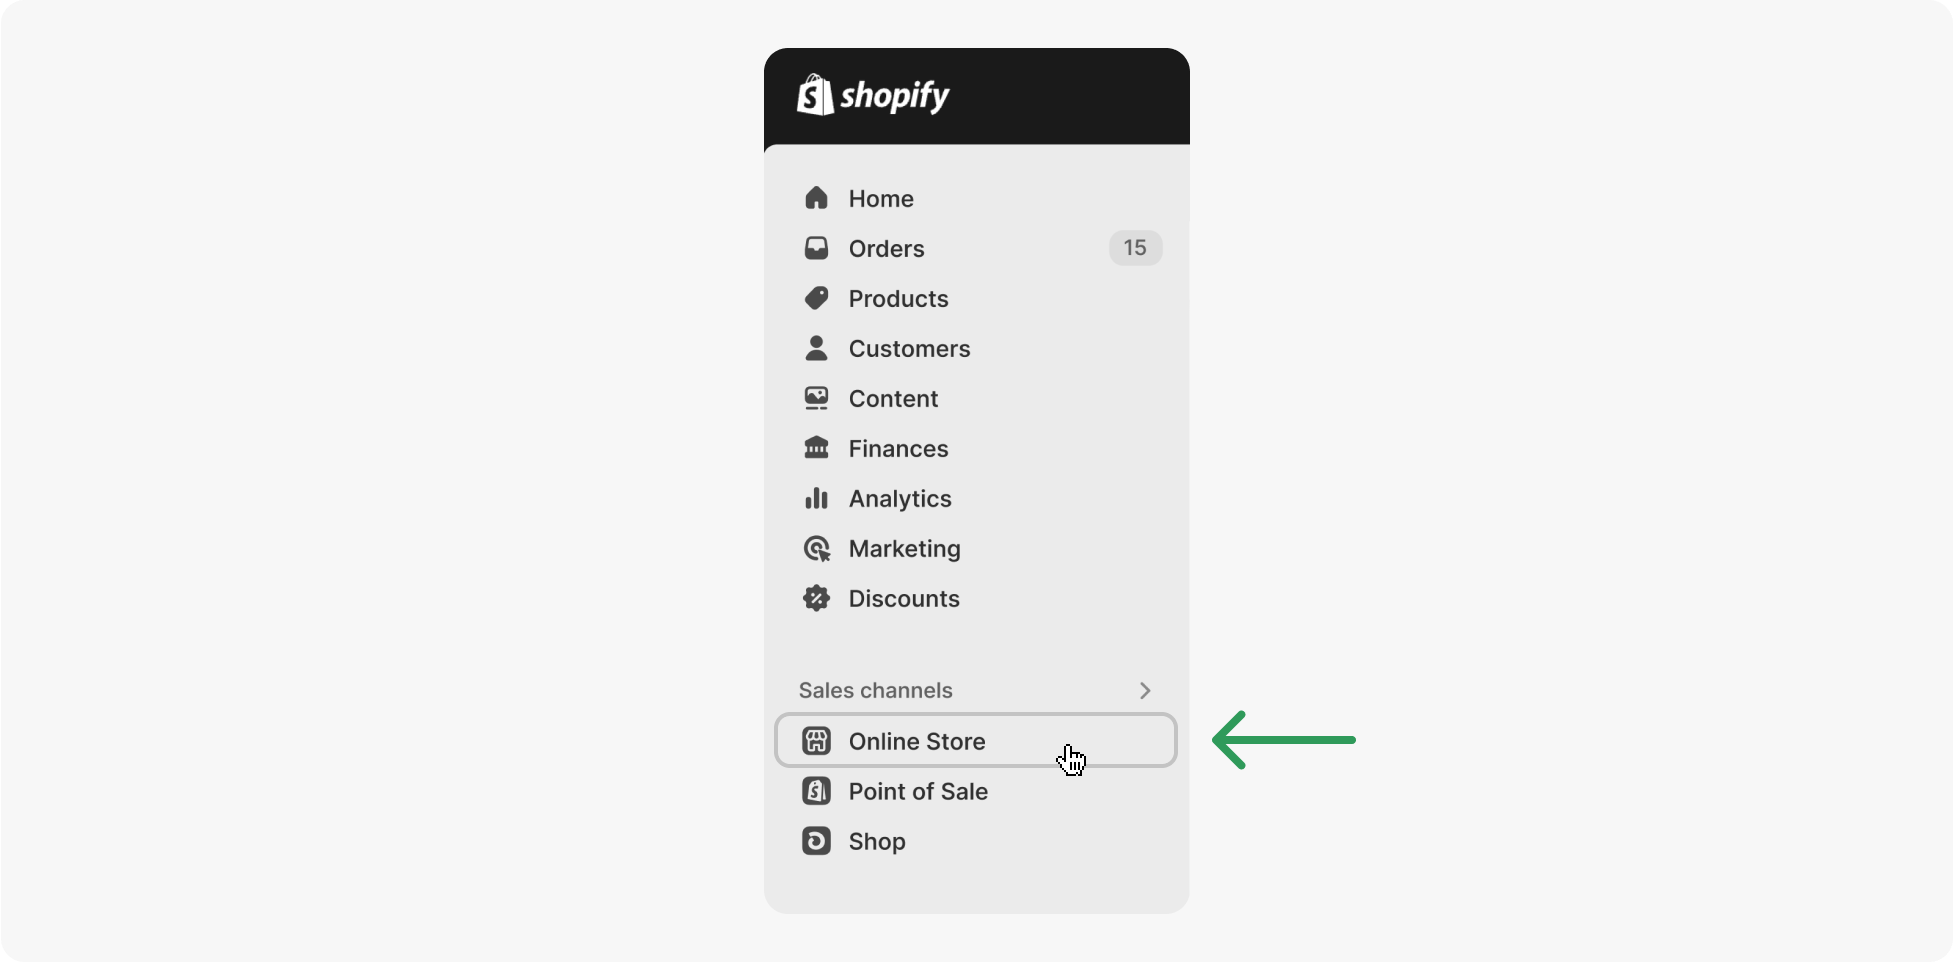
From your Shopify admin dashboard, navigate to the left menu and click on Online Store, under Sales channels.
Alternative: For Shop App or Hydrogen Setups
If your store does not have a theme installed, you can access the checkout settings for Shop App or Hydrogen through the Settings page.
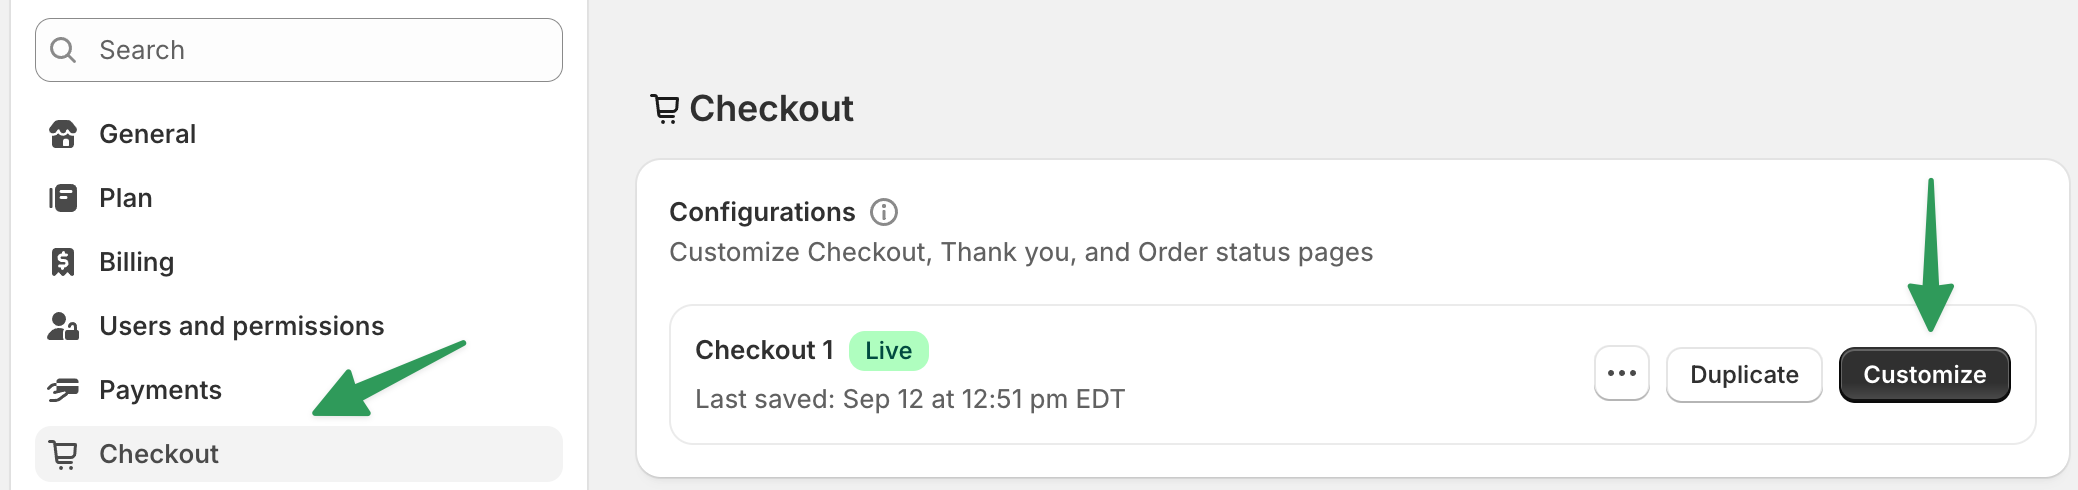
On your Shopify Store Admin page, navigate to Settings (click on the Gear icon in the lower left corner).
Next select Checkout on the left menu, then click Customize to open the Checkout editor.
Skip to step 6 to continue.
4. Ensure the theme is selected
After clicking Online Store previously, Themes should be selected by default, if not click Themes to continue.

5. Open theme customization
On the right side of the screen, locate the button labeled Customize near the top. Click this to open the theme editor.

6. Navigate to Checkout and New Customer Accounts
You are now in the Shopify theme editor. At the top of the editor, click on Home page to open a dropdown menu. From the dropdown, select Checkout and new customer accounts.

7. Locate the Uptick app
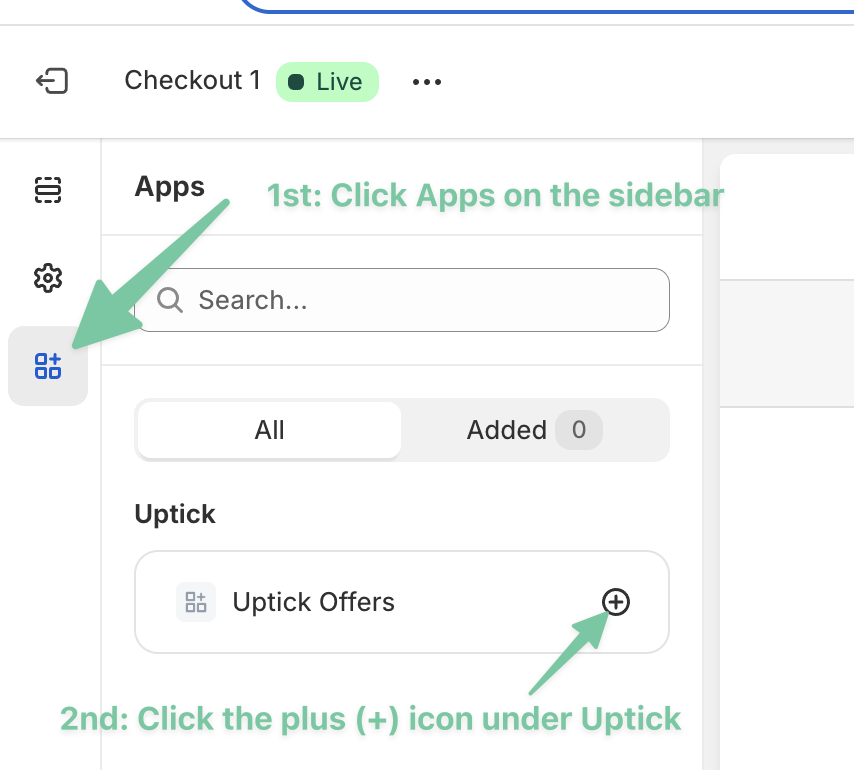
On the left side menu, click the Apps icon. You should see “Uptick” listed under “Apps”. Click the Plus (+) icon next to Uptick Offers.
8. Add Uptick to the Thank You Page
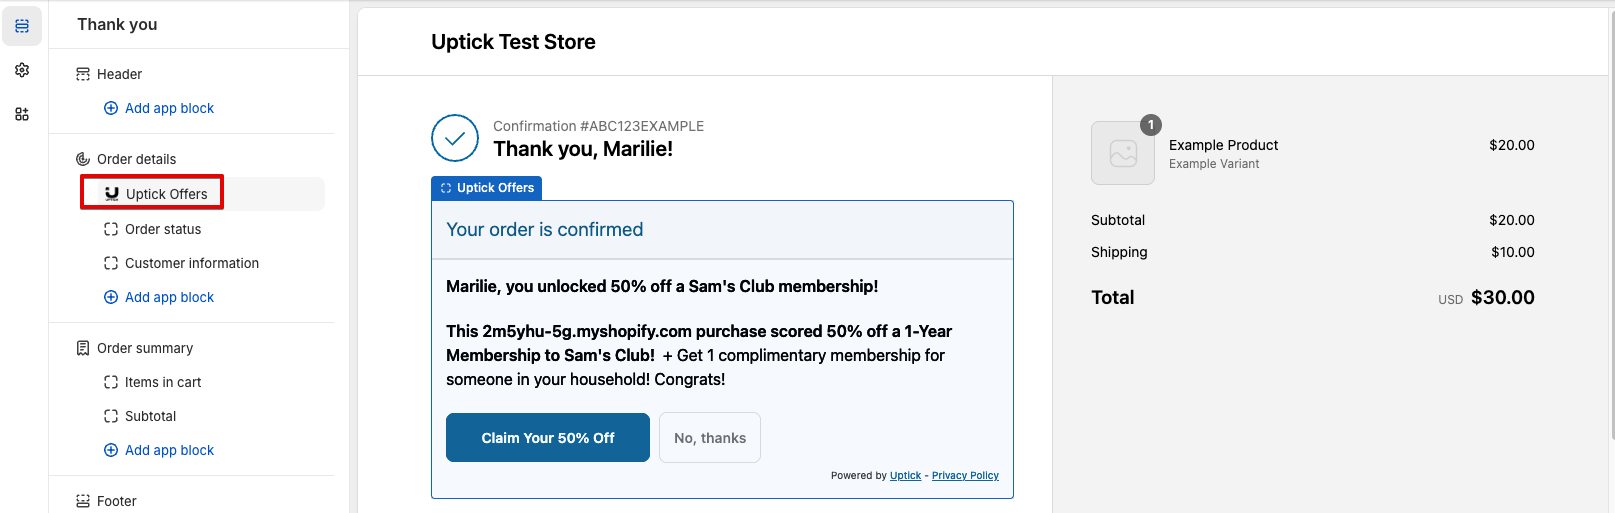
A popup will appear after clicking the plus (+) icon. Under the Add to section, click Thank you. This will open the “Thank you” page editor with the extension installed to preview.
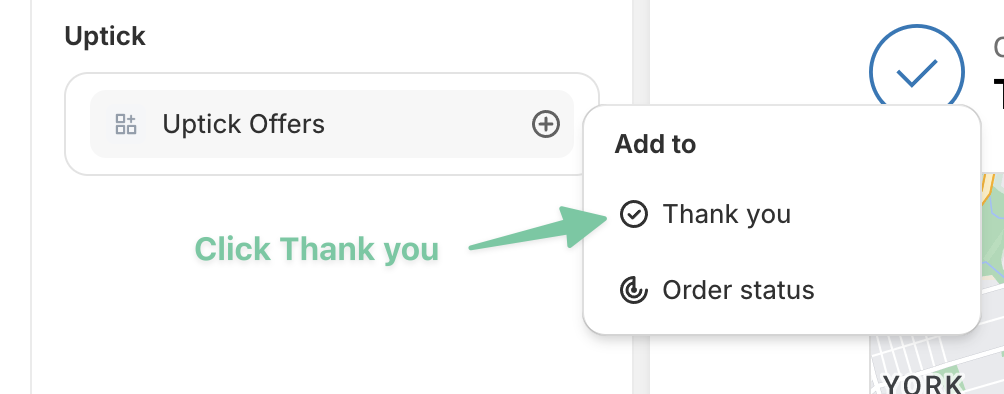
Uptick recommends placing the ad unit at the very top of the Order Details section for optimal performance.
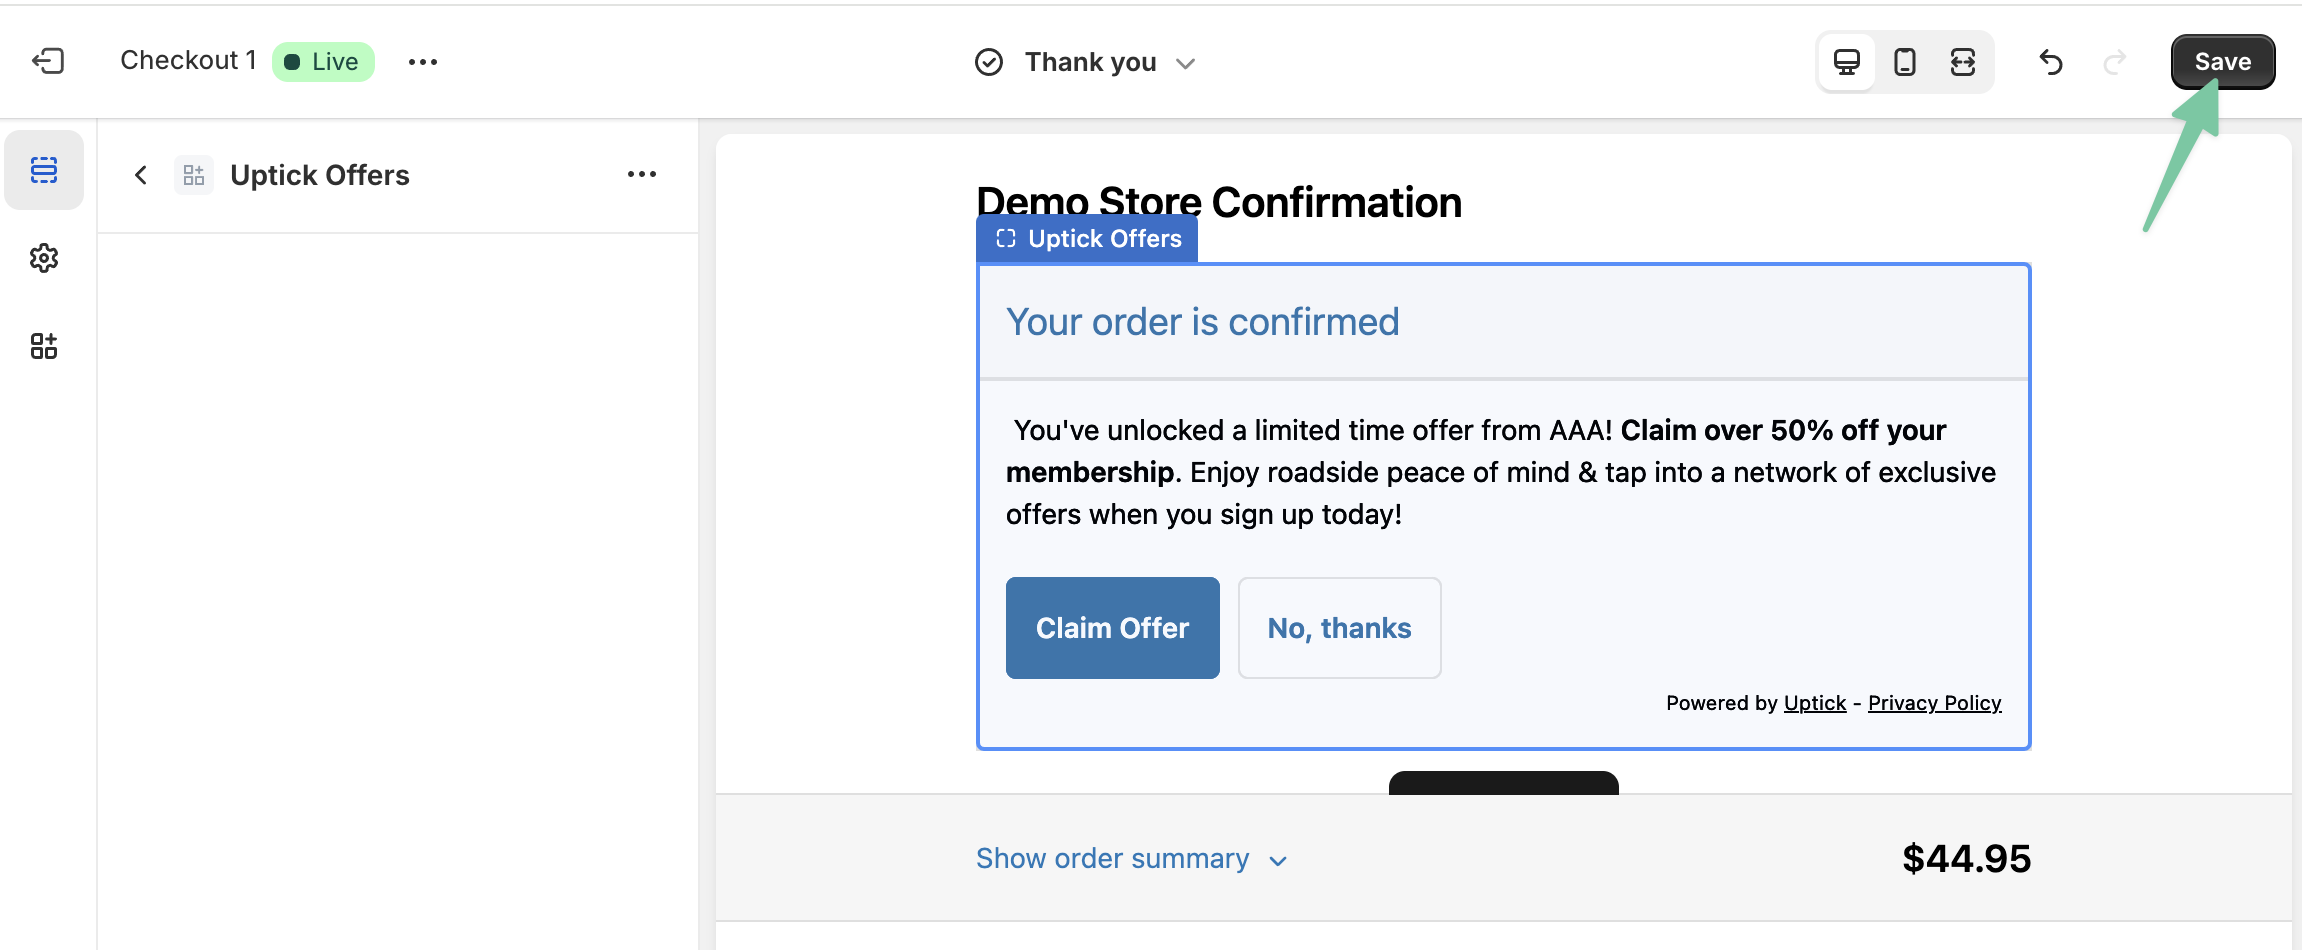
9. Save Changes to the Thank You Page
After confirming that the Uptick App appears in the preview, click the Save button in the top-right corner to save the theme changes.
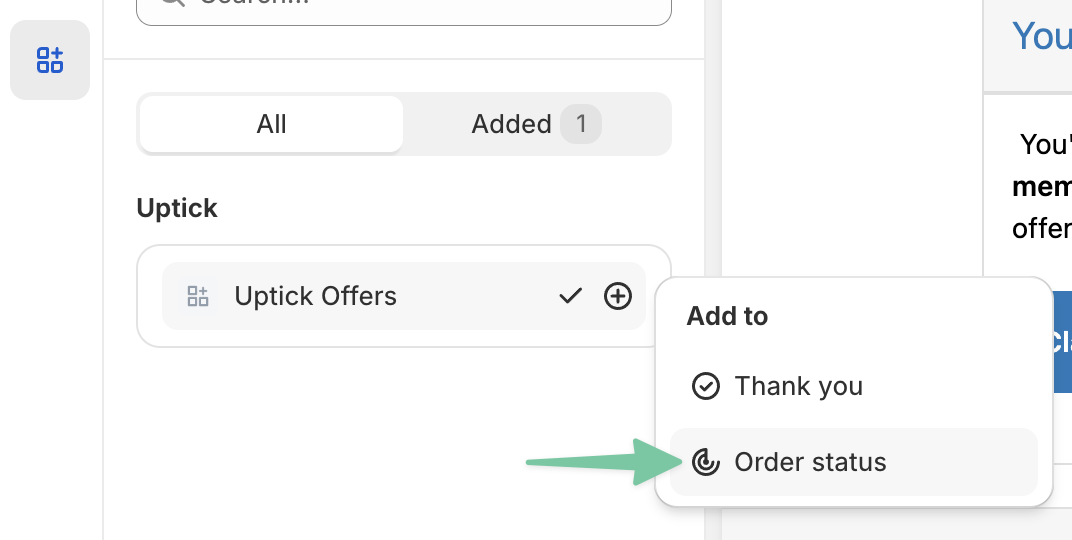
10. Add Uptick to the Order Status Page
Click again on the Apps menu on the left, and then click the plus (+) icon next to Uptick Offers. In the popup, under Add to, select Order status. This will open the “Order status” page editor with the extension installed to preview.
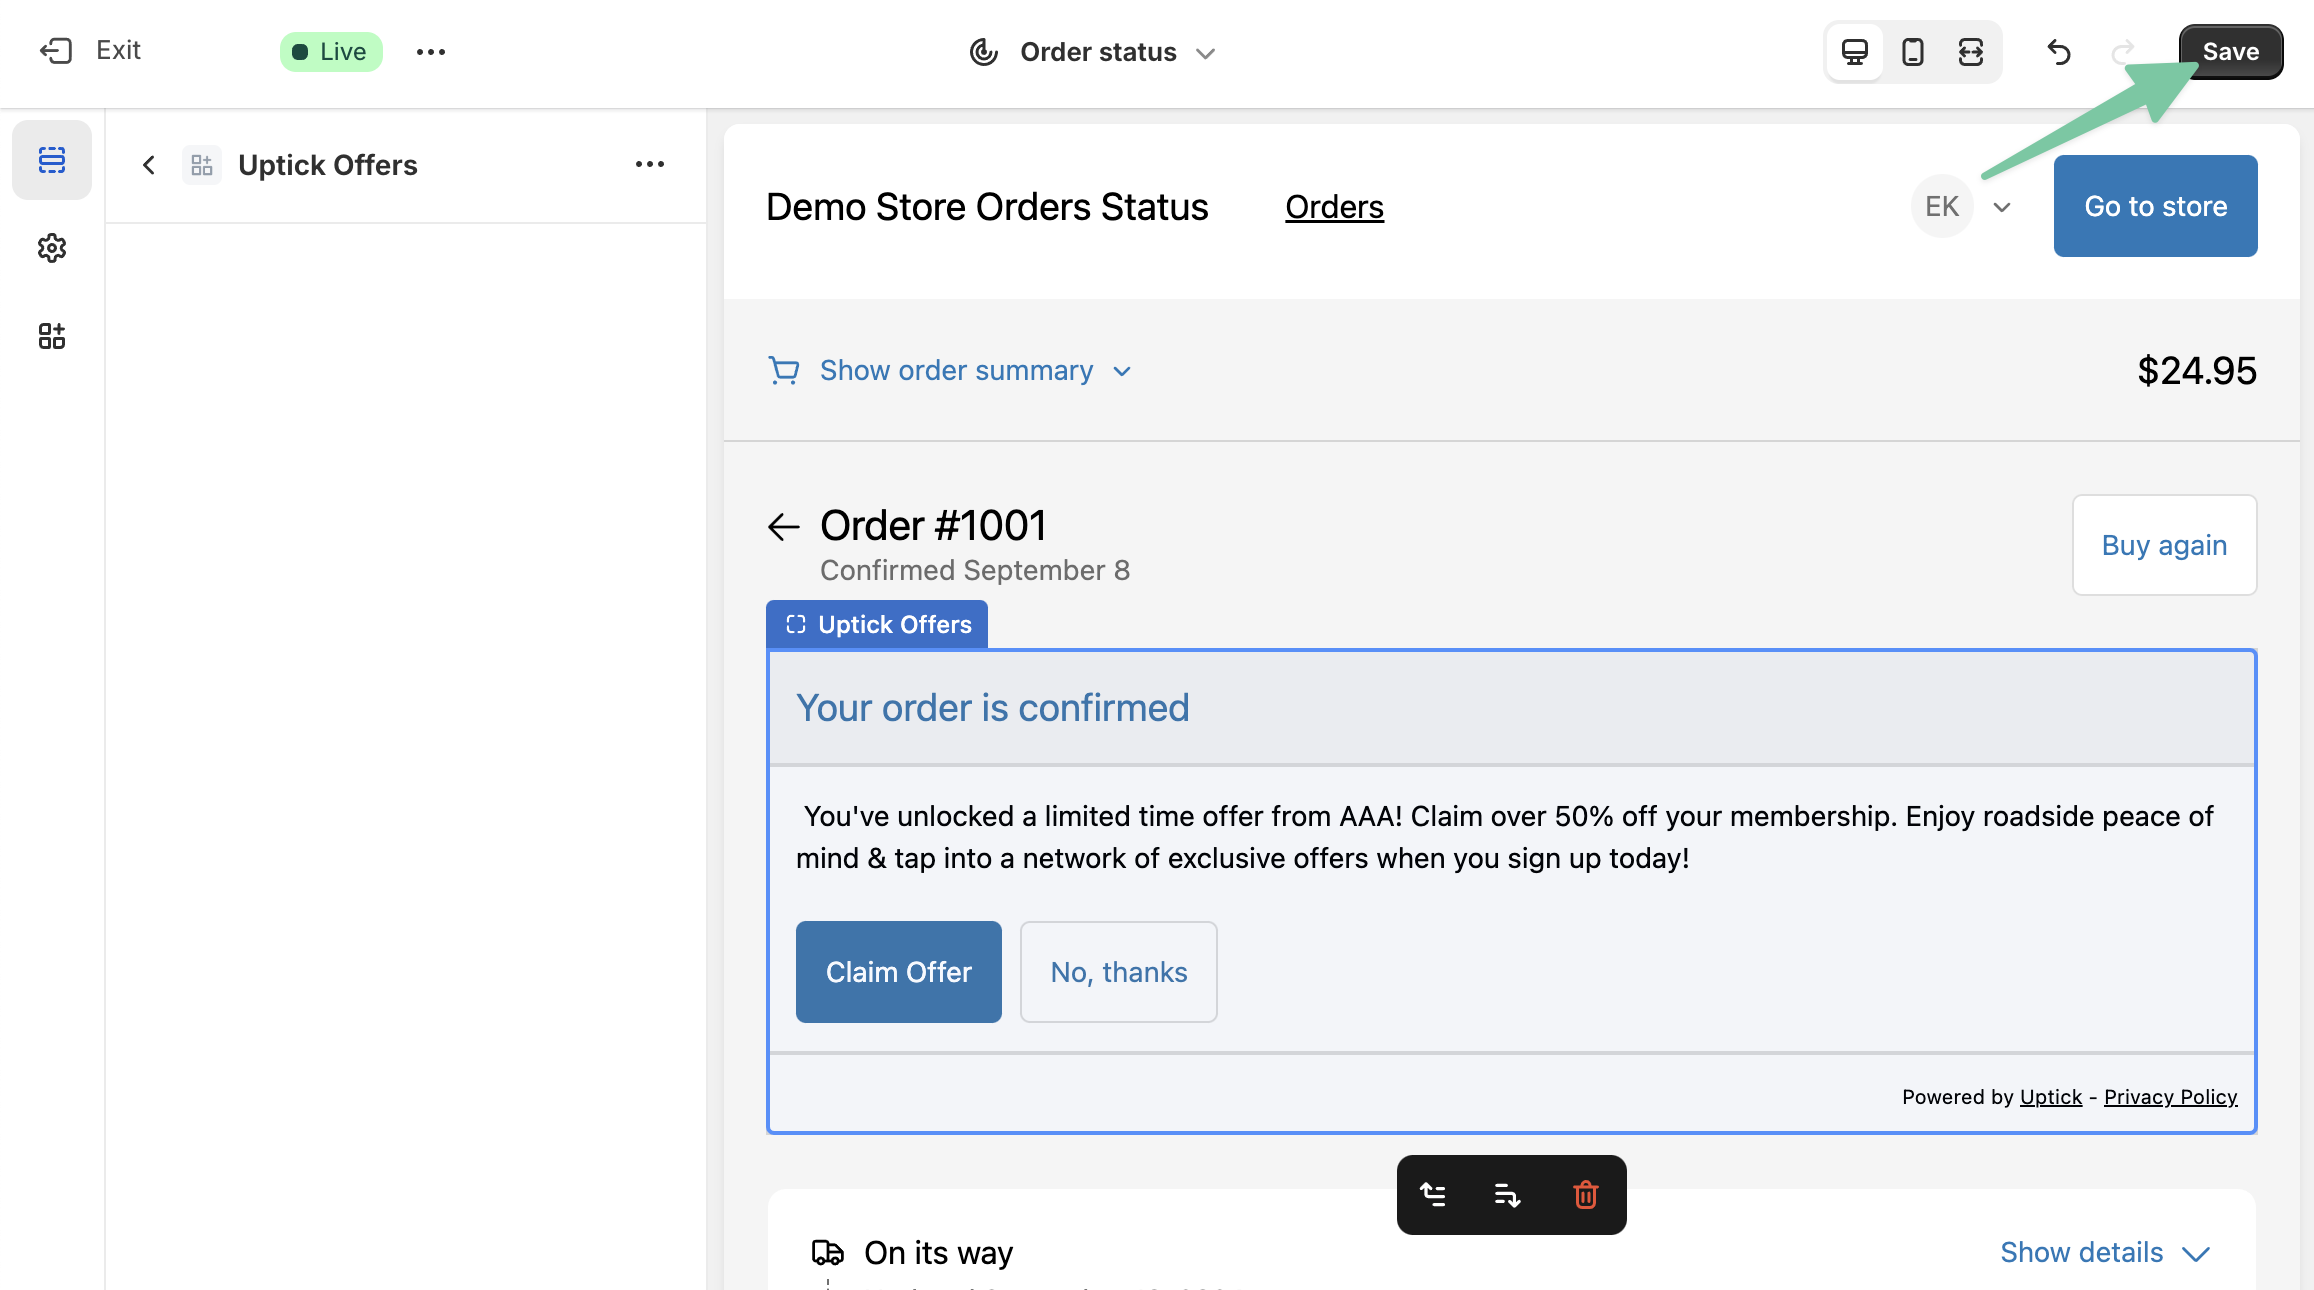
11. Save Changes to the Order Status Page
Once you’ve confirmed that Uptick appears in the preview, click Save in the top-right corner to save the theme changes.
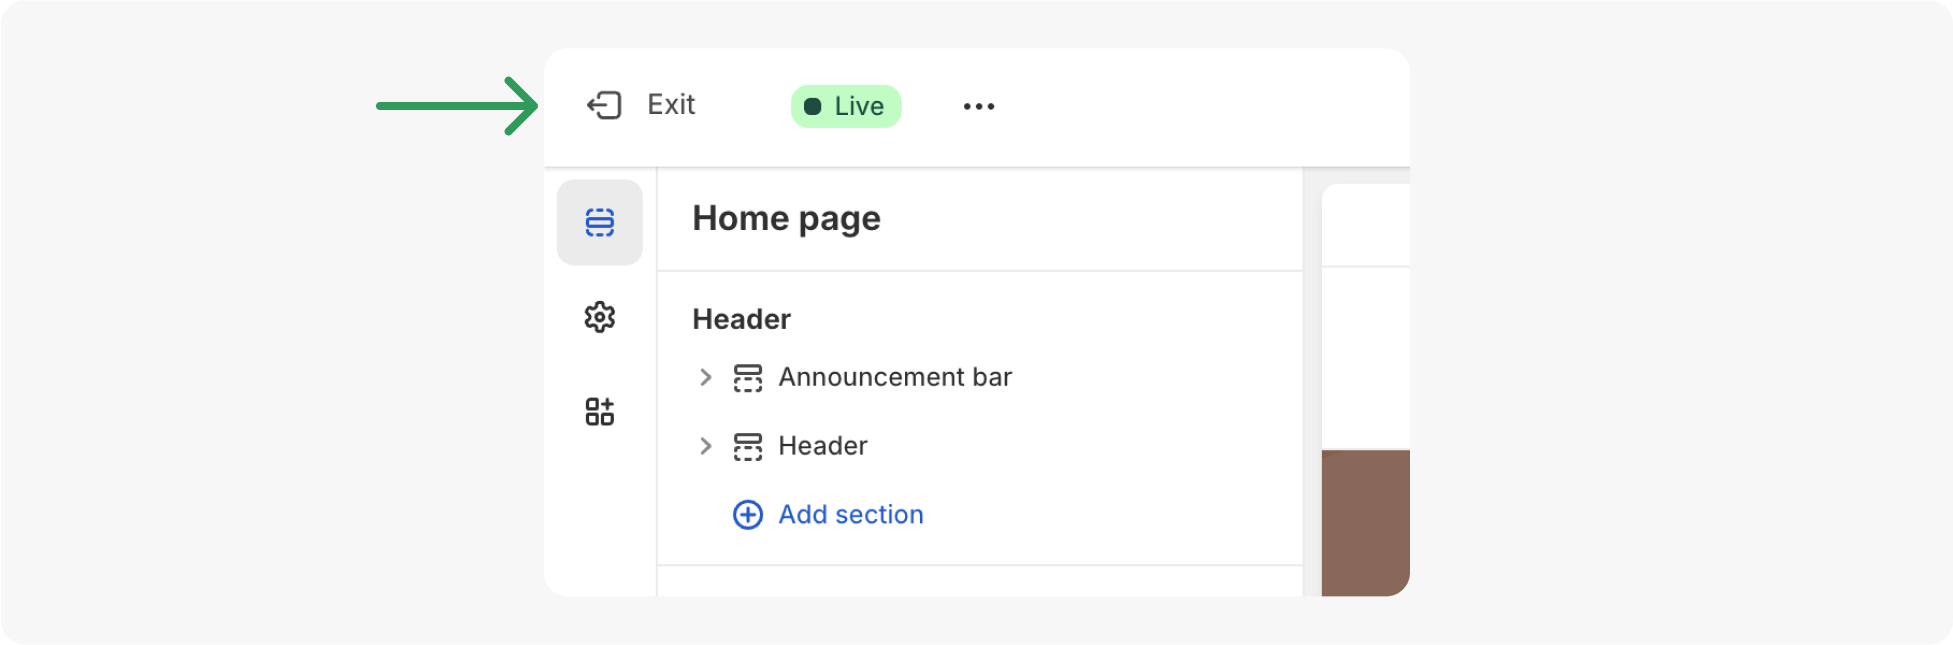
12. Exit the Theme Editor
Everything should be set up correctly at this point. Now you can exit the Theme Editor by clicking Exit in the top-left corner.
13. Create a Test Order to Confirm Uptick is Installed
To confirm everything is set up correctly, create a test order in your store. After the payment on the Order Confirmation page, the Uptick app should appear at the top with the same interface as seen in the theme previews above.
FAQ
Question: Where do I place my Uptick block on my Thank You pages?
Answer: We recommend placing the script immediately under where the customer sees their order confirmation number, at the top of the Order Details section
Question: How do I re-implement the Uptick popup implementation on the Shopify app?
Answer: Shopify does not allow popups on their upgraded Thank You pages. For this reason, all units will be embedded into the page. This is why it is important to place the Uptick unit as close to the top of the page as possible.
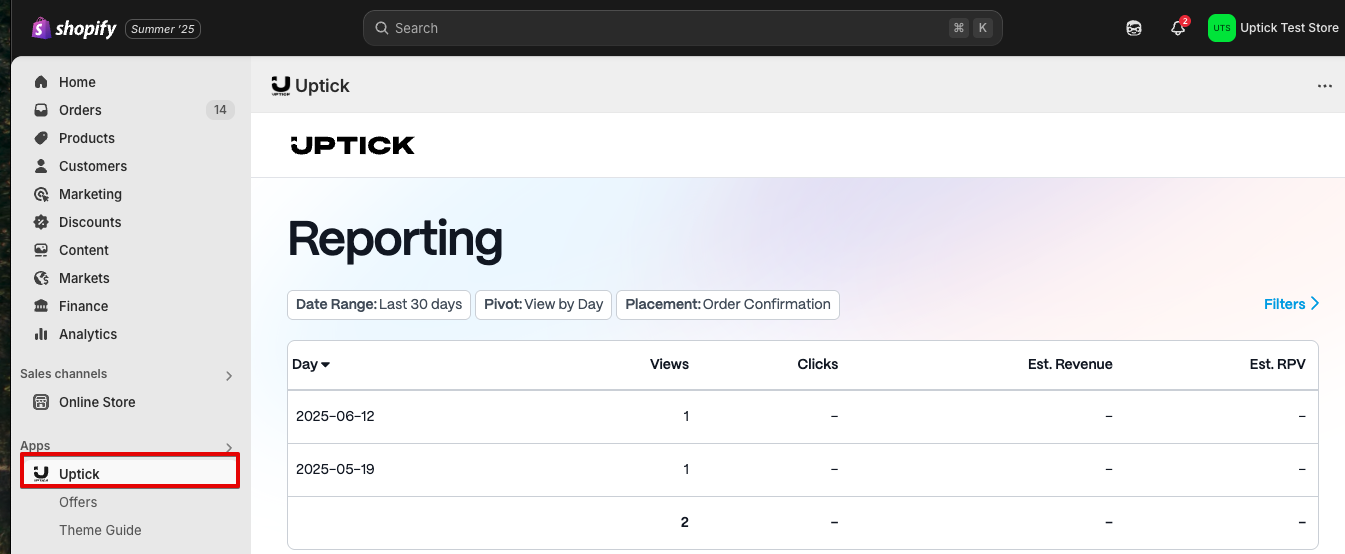
Question: How do I access Uptick reporting?
Answer: Once the Shopify app is downloaded, it creates a new Uptick integration instance. To access reporting, navigate to the Uptick Shopify app.
For clients who were previously live before the Shopify app download, reporting will temporarily live in both the Uptick reporting platform (pre-app install) and the Shopify app until all clients have moved to the Shopify app. Then, Uptick will merge the data for the two integration instances so all reporting lives in the Uptick Shopify app.
Legacy Documentation
Installing the Uptick Digital Advertising Widget (Legacy)
Enhance your Shopify store or app by seamlessly integrating our advertising widget. The setup is quick and consists of two core steps. By following these guidelines, you can embed our widget and showcase targeted advertising to your audience.
Where to install
In Shopify, go to Settings -> Checkout. Then scroll down to “Order Status page” and look for an “Additional Scripts” section.
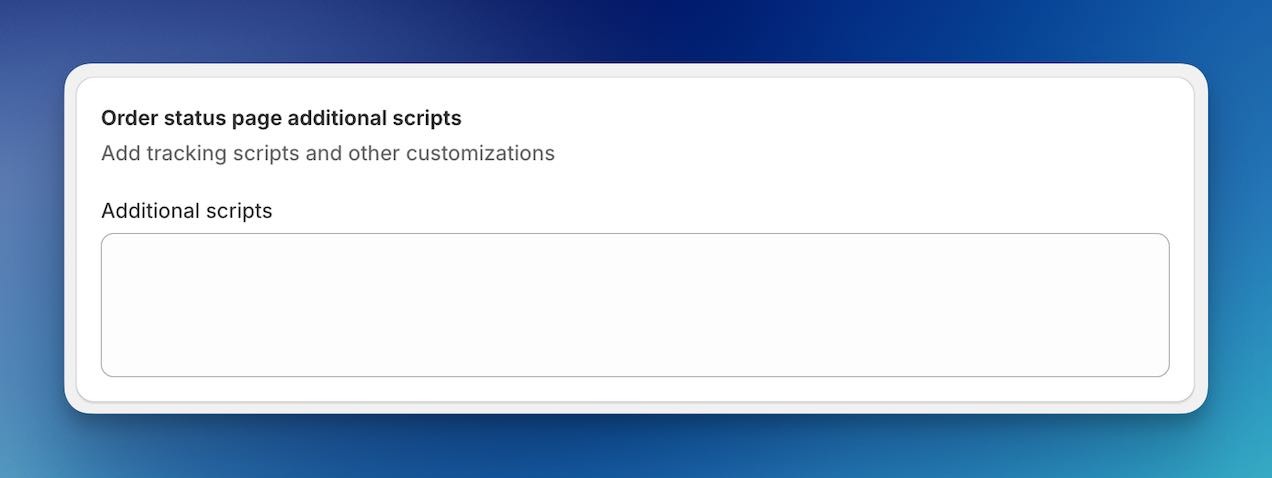
Inserting the HTML Placeholder
The initial step involves setting a placeholder where the advertising widget will appear. Utilize the following HTML snippet to designate the widget’s position on your page:
<div data-uptick-target="content"></div>
For Shopify Stores: To ensure a seamless appearance that complements your Shopify store’s design, we advise enhancing the HTML snippet with two additional classes. This aids in achieving a more cohesive and visually pleasing integration:
<div data-uptick-target="content" class="uptick-target section"></div>
Embedding the Activation Script
The activation script is crucial as it powers the widget and fetches the required content. After setting your placeholder from Step 1, proceed with embedding the below script:
<script src="https://app.uptick.com/i/places/AAAAAAAA-BBBB-CCCC-DDDD-EEEEEEEEEEEE/offers.js"></script>
Note:
Position the script tag immediately after the DIV element. This sequencing ensures the widget locates the placeholder without any hiccups and populates it efficiently.
The script tag contains an ID (AAAAAAAA-BBBB-CCCC-DDDD-EEEEEEEEEEEE). Ensure that you replace this with the correct ID assigned to your integration. Using an incorrect or generic ID will lead to unsuccessful widget activation.
Troubleshooting Tips:
- If you encounter any layout disruptions, confirm that you’ve placed the script tag in the right sequence and used the appropriate integration ID.
- Ensure that no other scripts or styles on your page conflict with our widget’s functionality. If the issue persists, reach out to our technical support team for further assistance.